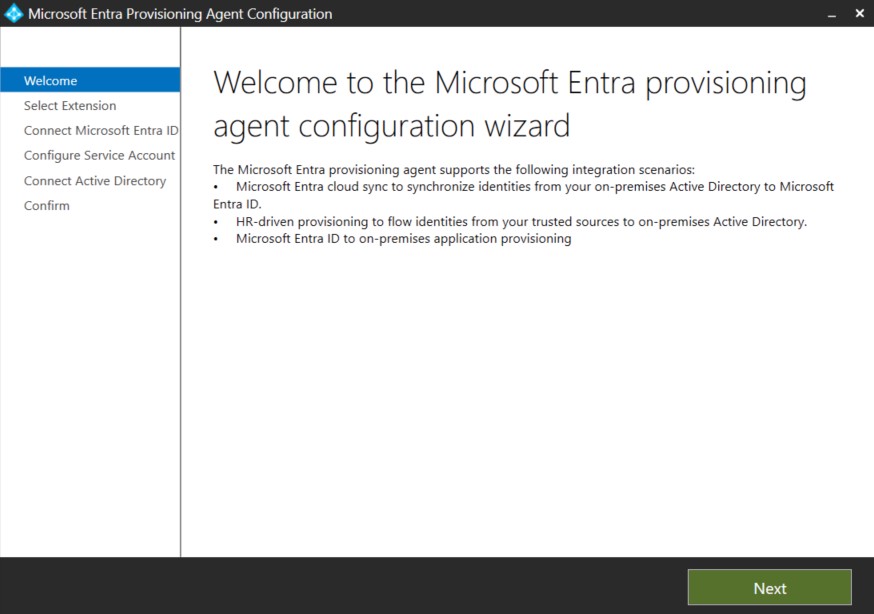
Introduction
Most modern applications meet the SCIM standard for REST API integrations but there are situations with legacy applications where SCIM is not available but has REST API for user provisioning. You can leverage Extensible Connectivity Management Agent (ECMA2) deploying on the Windows Server and creating PowerShell connector for SCIM integration with Cloud IAM and External application.
Architecture Diagram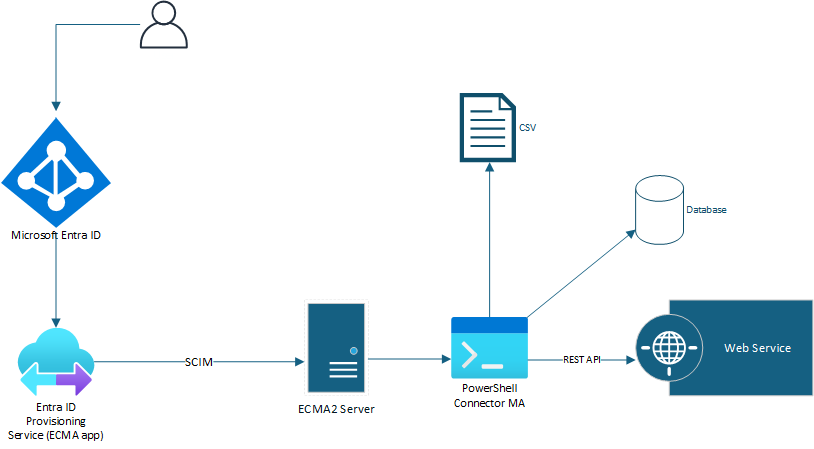
Prerequisites
- On-Premise prerequisites – https://learn.microsoft.com/en-us/entra/identity/app-provisioning/on-premises-powershell-connector#on-premises-prerequisites
- Cloud requirements – https://learn.microsoft.com/en-us/entra/identity/app-provisioning/on-premises-powershell-connector#cloud-requirements
Download and Setup On-Premise ECMA2 Agent
- Sign in to the Microsoft Entra admin center as at least an Application Administrator.
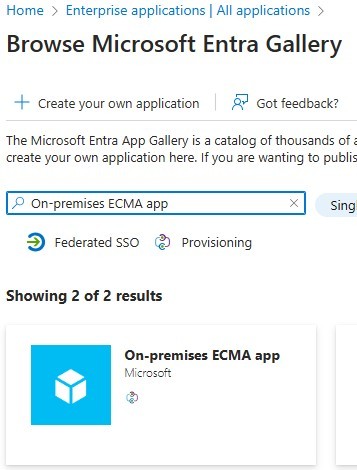
- Browse to Identity > Applications > Enterprise applications.
- Select New application.
- Search for the On-premises ECMA app application, give the app a name (example: “ECMA PowerShell MA”), and select Create to add it to your tenant.
- Navigate to the Provisioning page of your application.
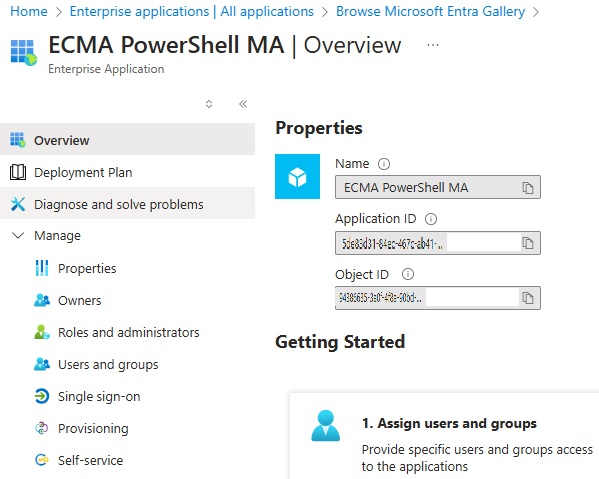
- Select Get started.
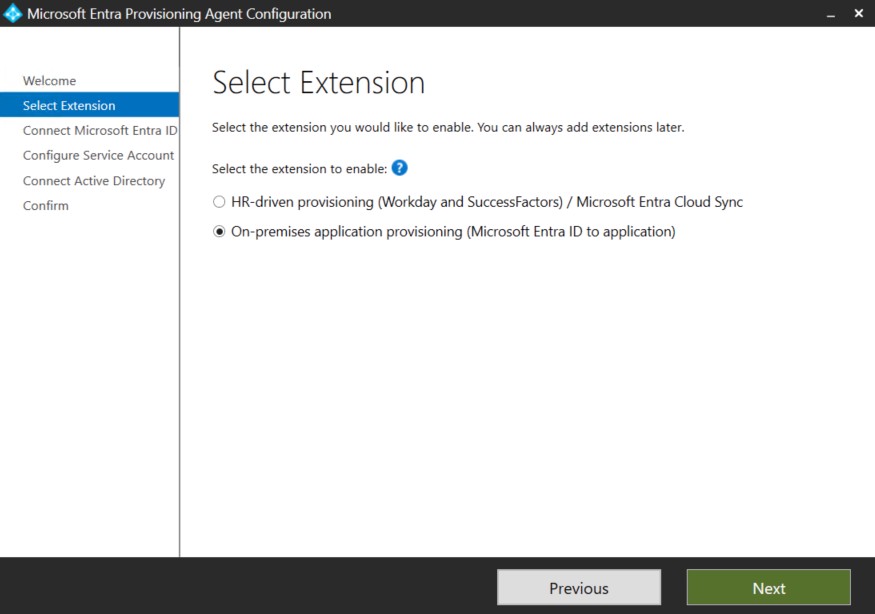
- On the Provisioning page, change the mode to Automatic. Click on On-Premise Connectivity and select Download and install link, then you can download the Microsoft Entra Provisioning Agent.

- Install the Agent on the ECMA2Host Server (Windows Server 2016 or a later version.)
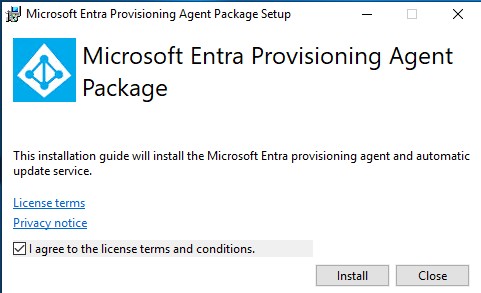
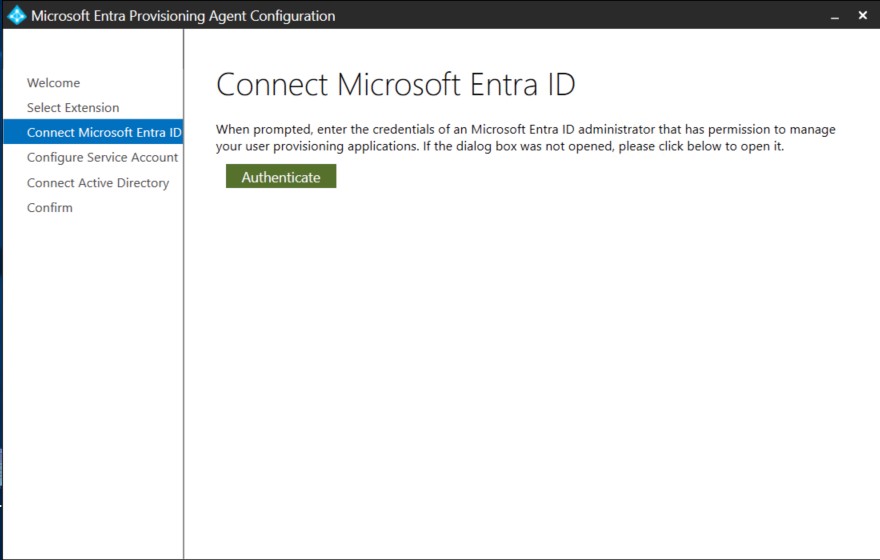
Sign-in to Azure at least with Hybrid Identity Administrator role and Authenticate then Confirm.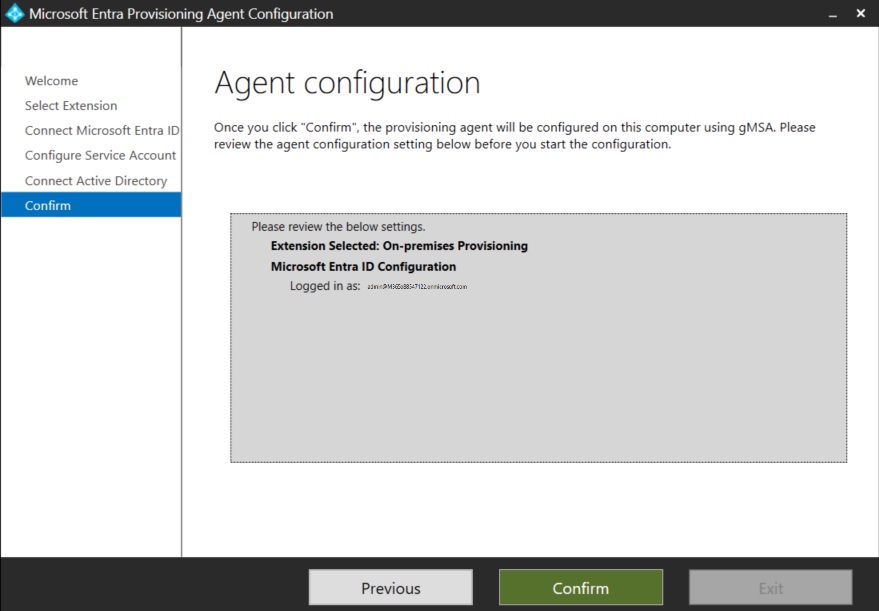
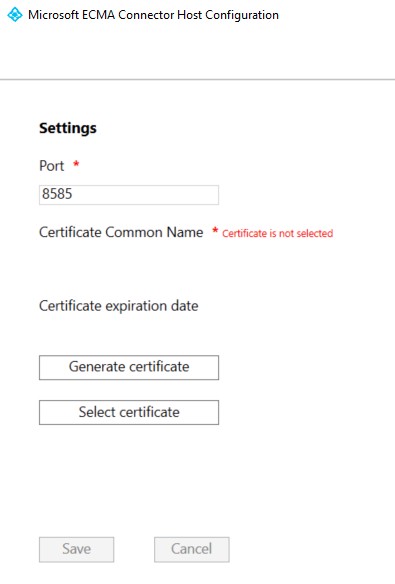
- After installation is successfully completed. Open the Microsoft ECMA2Host Configuration Wizard application. Then generate and create or import an existing SSL Certificate.
Setup PowerShell Connector
- Download the PowerShell Connector Configuration Files.
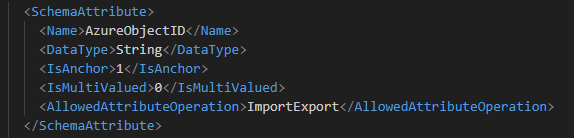
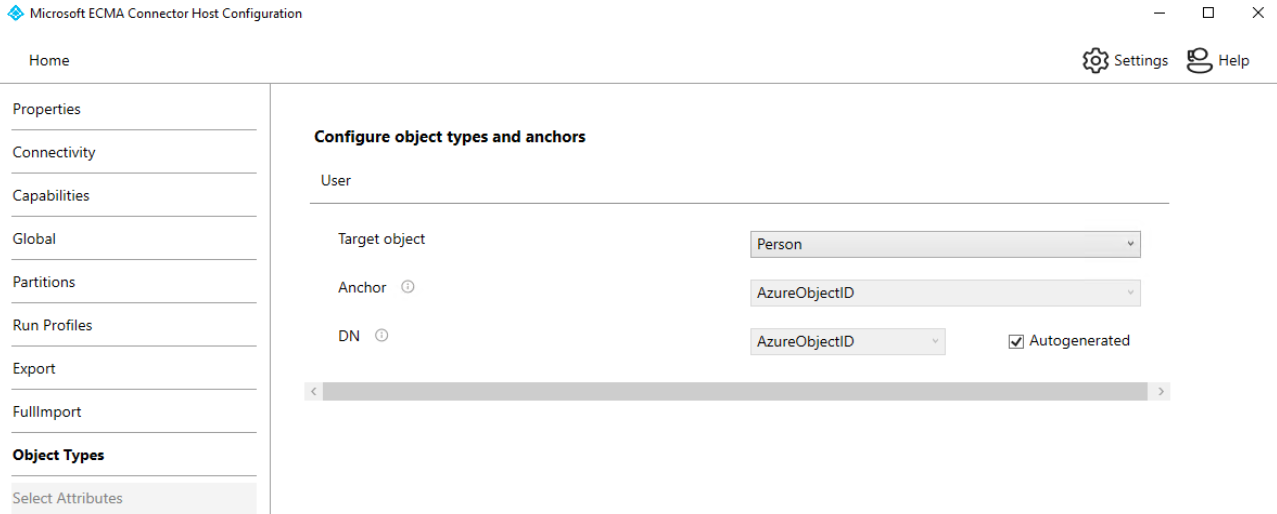
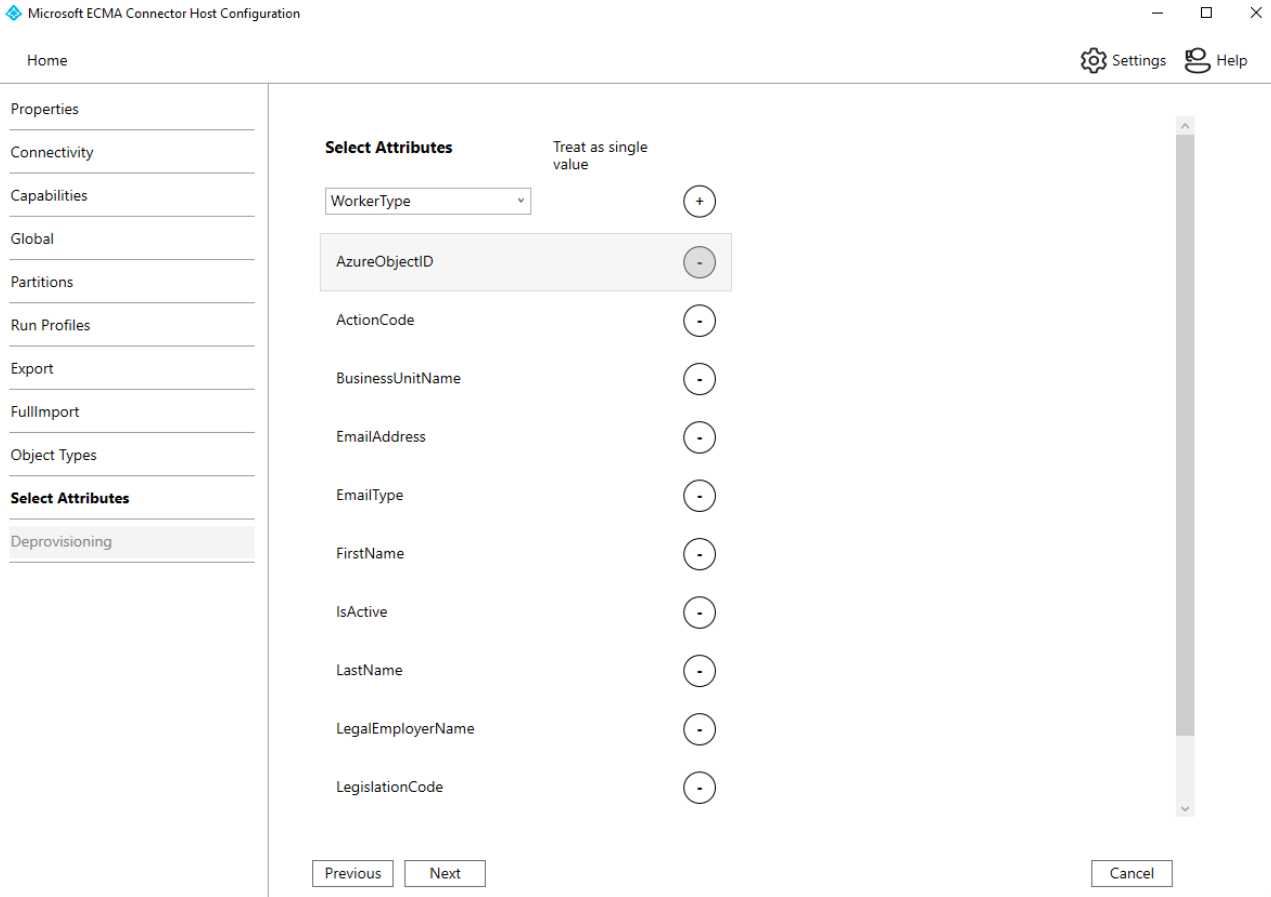
- In the example the Target Application, the anchor attribute is AzureObjectID, the unique identifier for the user and the other attributes as the flow attributes. The Schema.xml file will look like this:
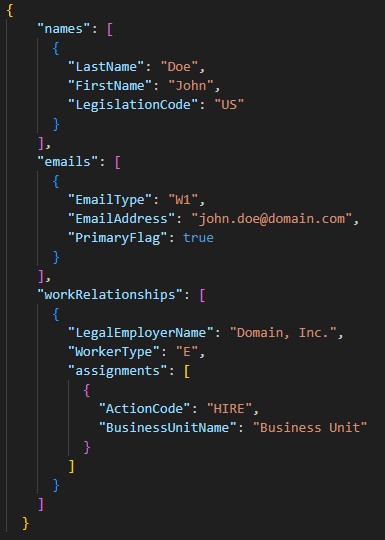
- The sample JSON.
- Create folder “C:\Logs” on the ECMA Server
- Edit the following files per your requirements
- Export Script.ps1
- Replace “https://samplerest.faisalrahman.com/Person” with your URI.
- Update the Function “Add-WebServiceProvisionedUser” and the variable “$body”
- Import Script.ps1
- Replace “https://samplerest.faisalrahman.com/Person” with your URI.
- InputFile.txt
- Update per your Schema
- Schema.xml
- Update per your Schema
- Export Script.ps1
- Copy the following files from your Scripts folder to locations below:
| File | Location |
|---|---|
| InputFile.txt | C:\Program Files\Microsoft ECMA2Host\Service\ECMA\MAData |
| Schema.xml | C:\Program Files\Microsoft ECMA2Host\Service\ECMA |
Configure Entra ID ECMA app
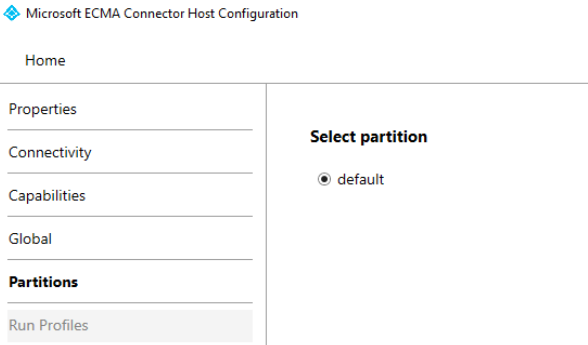
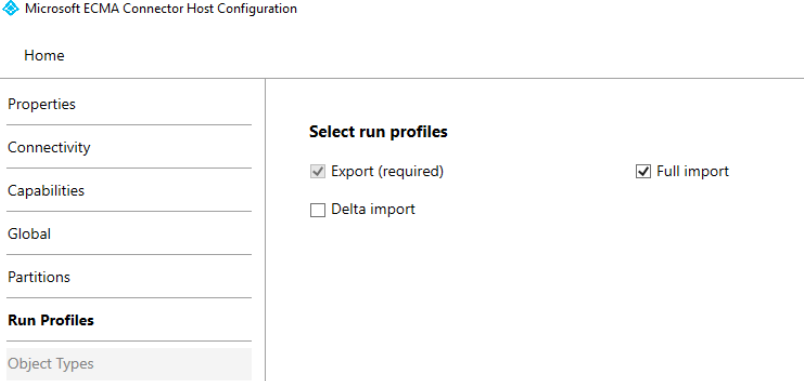
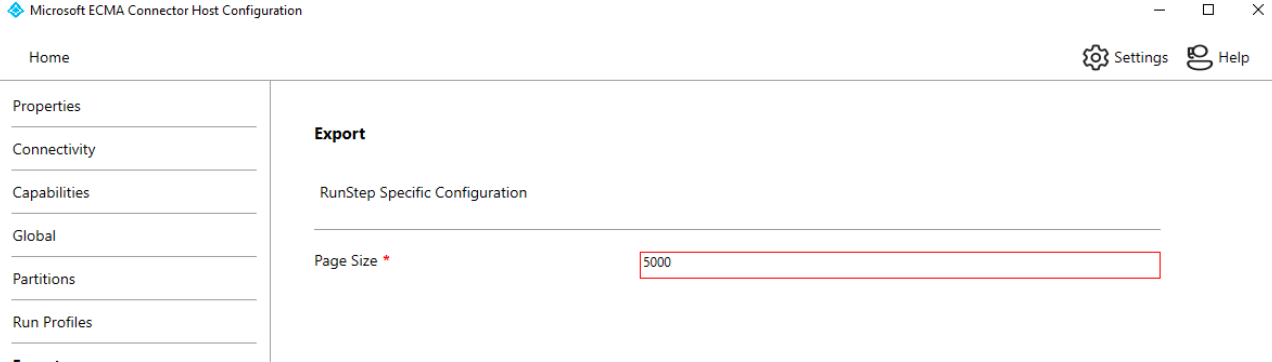
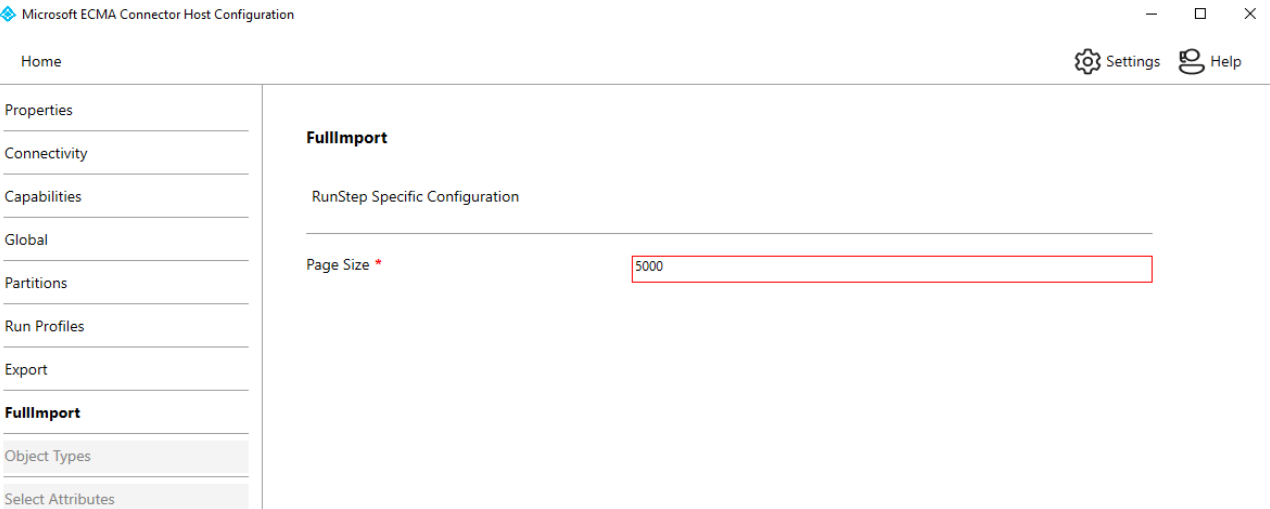
- Open the “Microsoft ECMA2Host Configuration Wizard” application from the ECMA Server
- Click “+ New Connector” then configure.
⦿ Secret Token is a 15 character password that will be needed later in the configuration.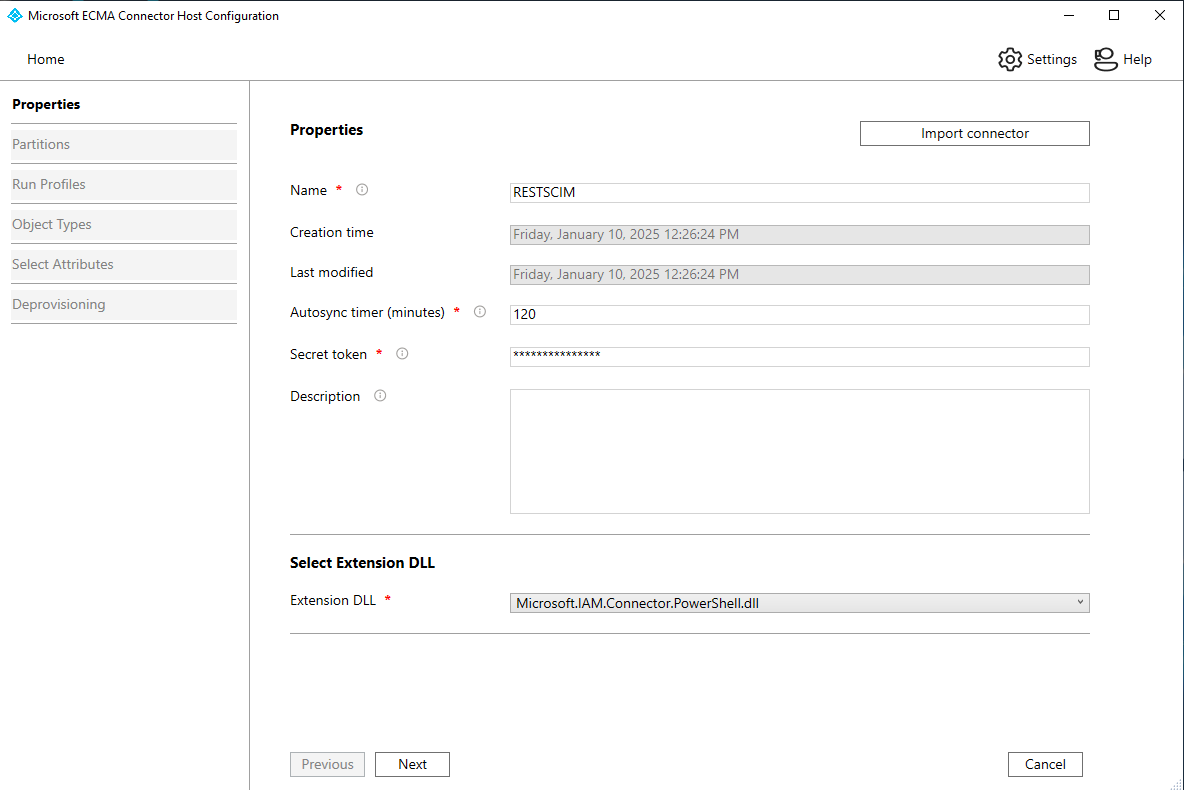
⦿ User and Password is for the REST API endpoint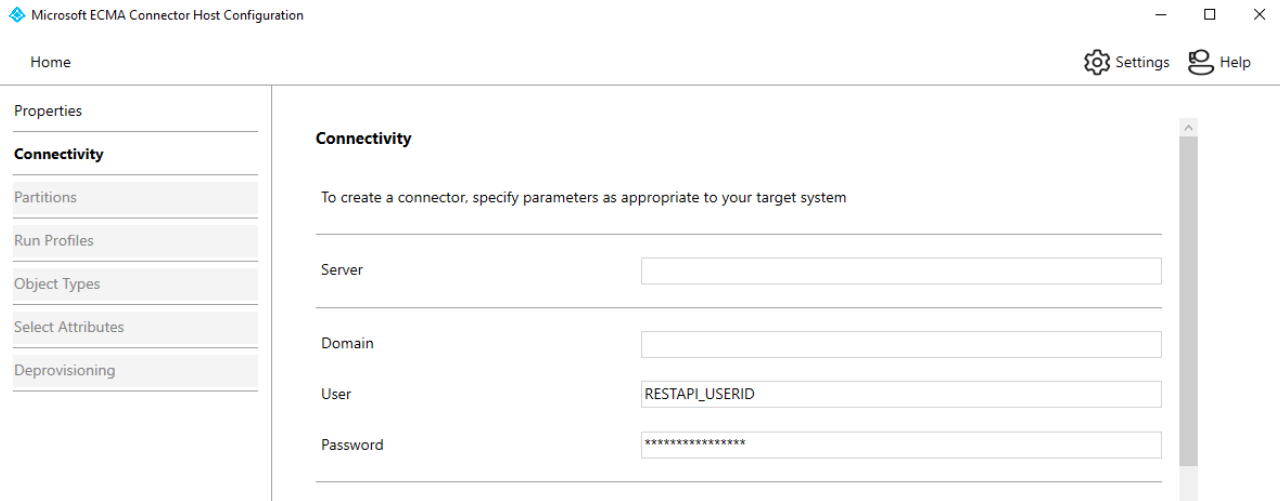
⦿ Copy “CommonModule.psm1” script to the “Common Module Script”
⦿ Copy “Schema Script.ps1” script to the “Schema Script”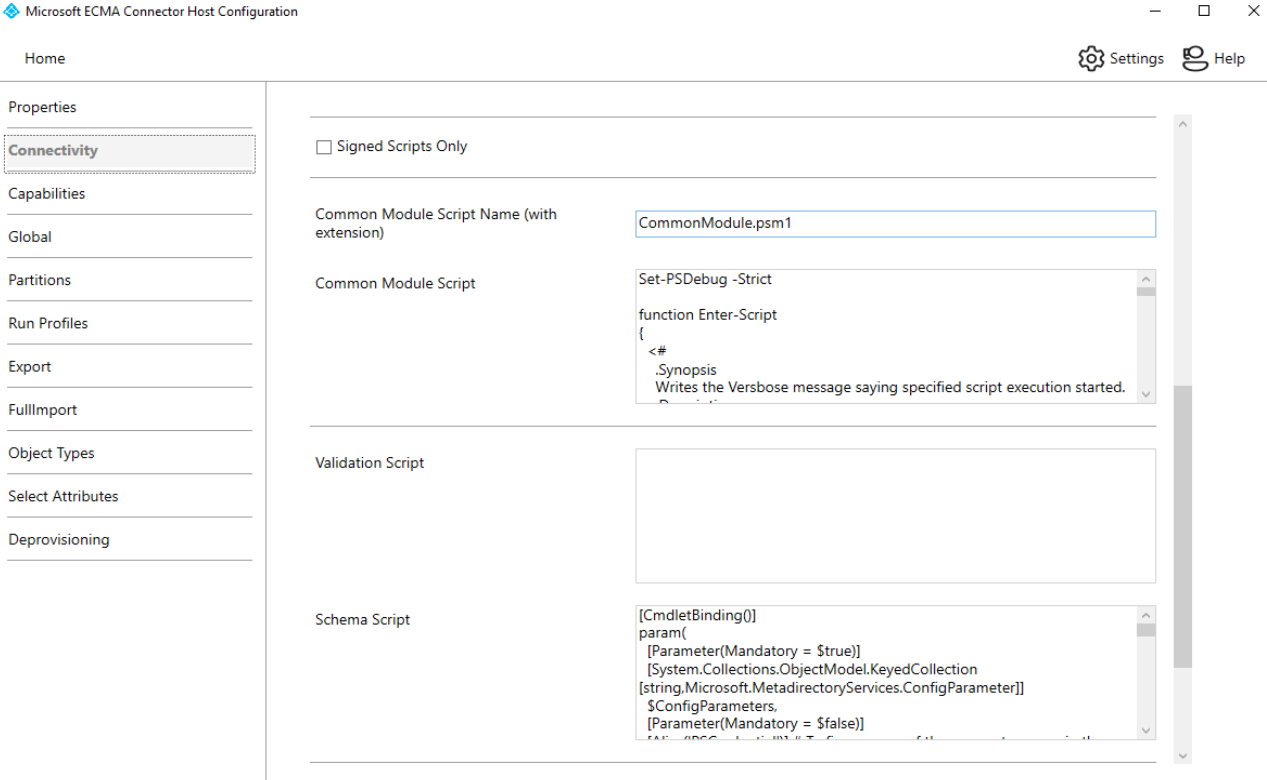
⦿ Copy “Import Script.ps1” script to “Import Script”
⦿ Copy “Export Script.ps1” script to “Export Script”
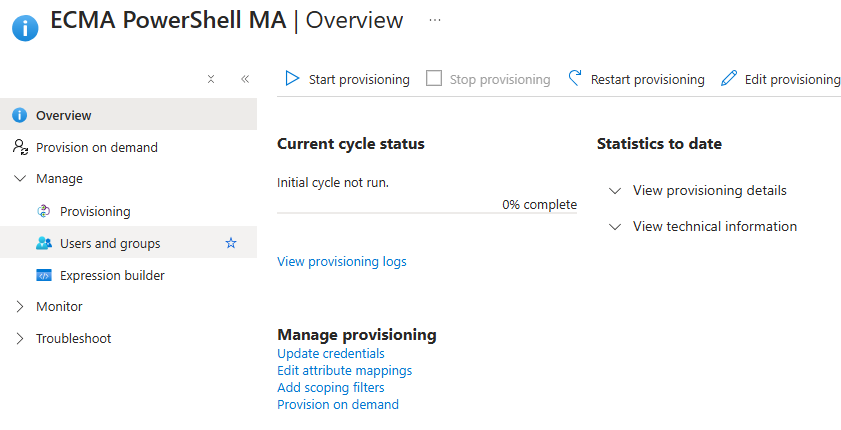
Open the “ECMA PowerShell MA” Enterprise Application from Azure Portal
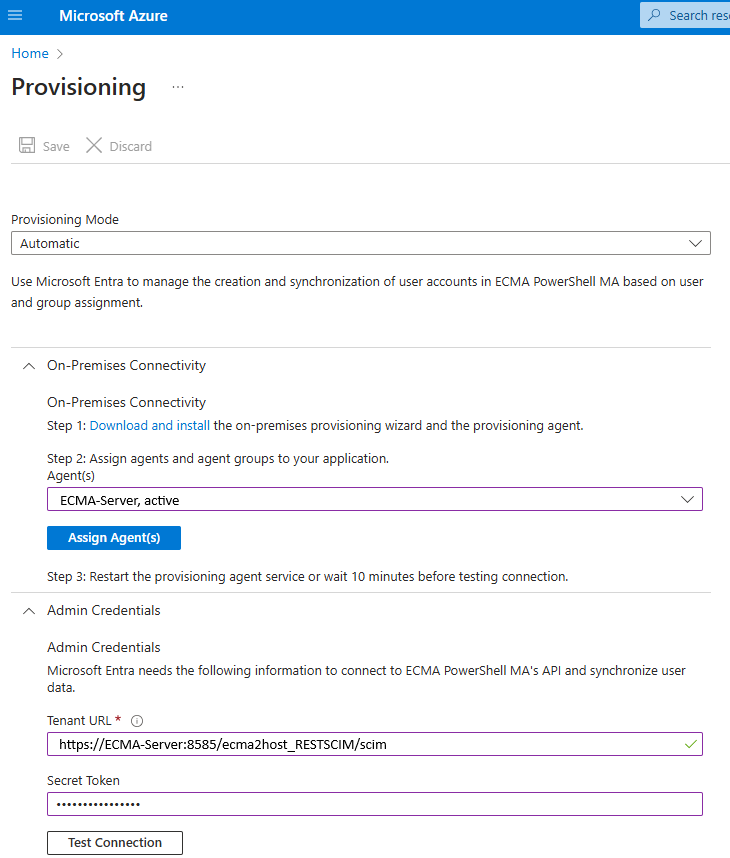
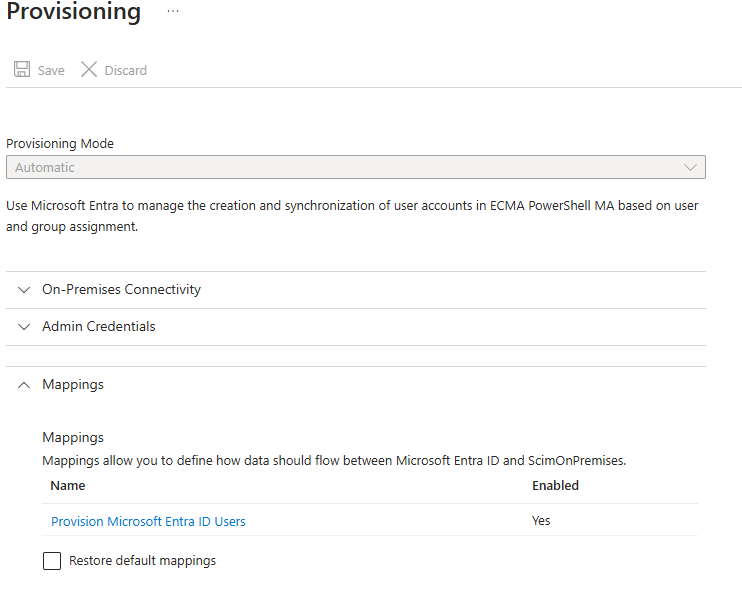
- Navigate to “Provisioning -> Manage -> Provisioning” then select “Automatic”

- Select the ECMA2Host Node from the list and enter the required information. Then click “Test Connection” and “Save”. (Secret Token is the previously defined in the “Microsoft ECMA2Host Configuration”).
- Click “Edit provisioning” for mapping attributes.
- Click “Provision Microsoft Entra ID users” link.
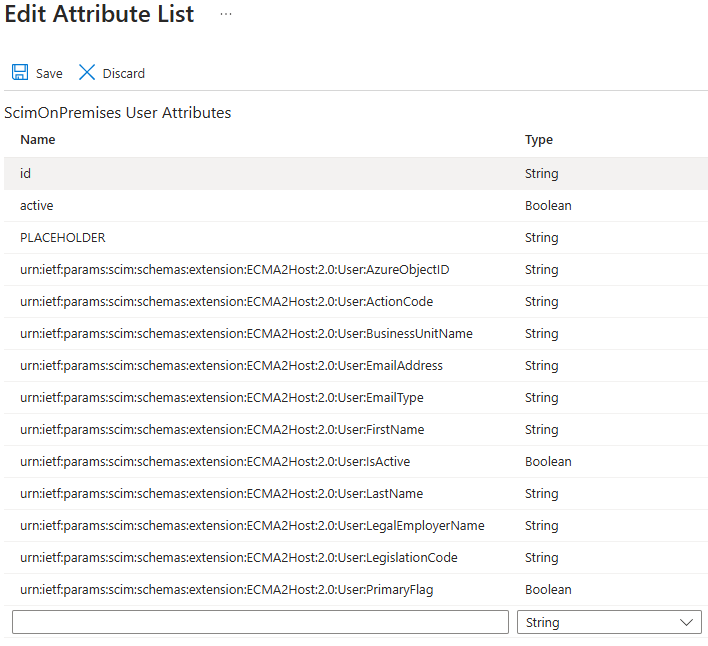
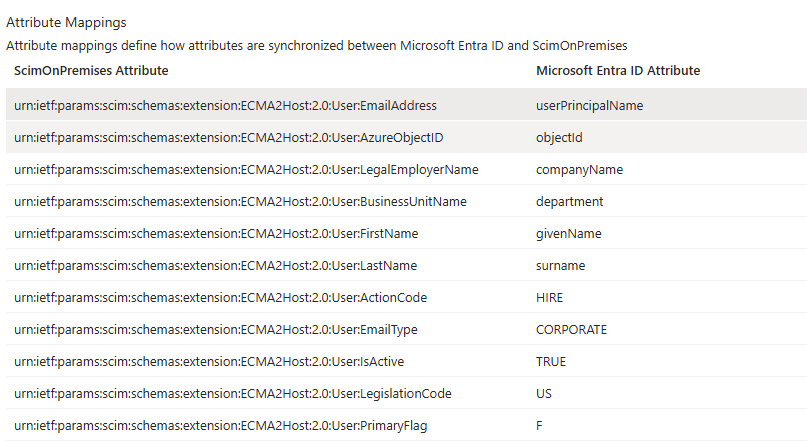
- Validate the SCIM attributes by clicking “Show advanced options” and then clicking “Edit attributes list for ScimOnPremises” link.
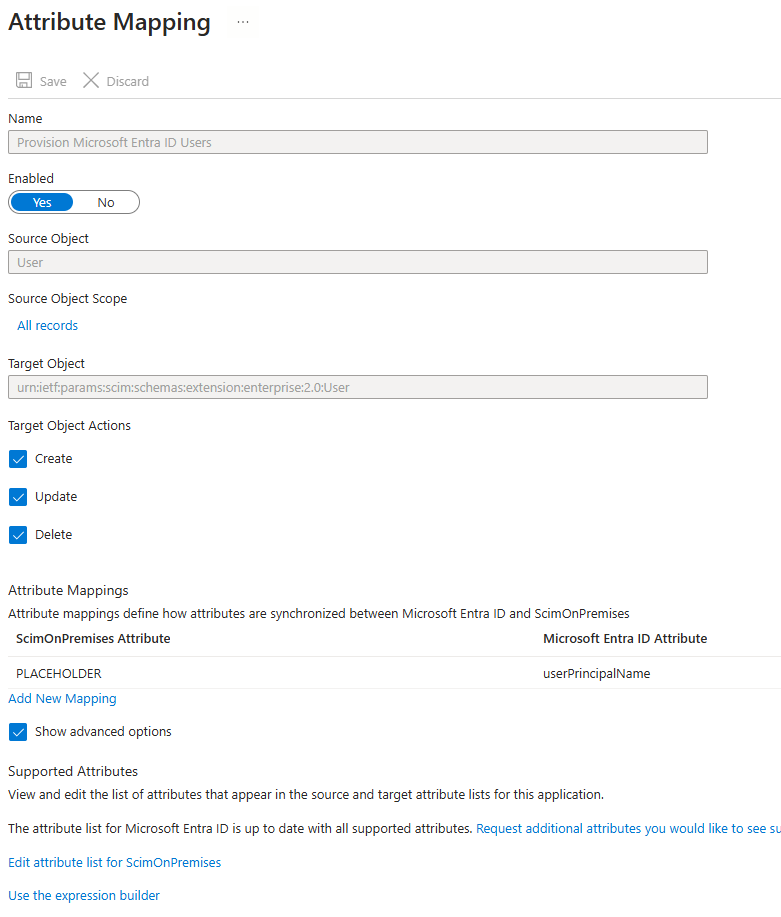
- Review all the attributes that was configured in PowerShell Connector are listed.
- Configure new mappings by clicking “Add New Mapping”
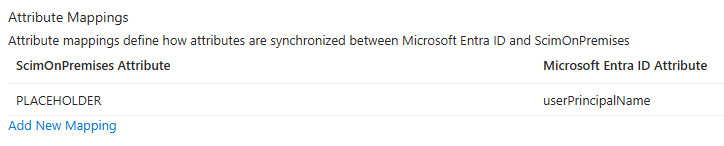
- Follow example below and then repeat for all. Note there are Direct and Constant for demonstrating the example.

Validate Connector
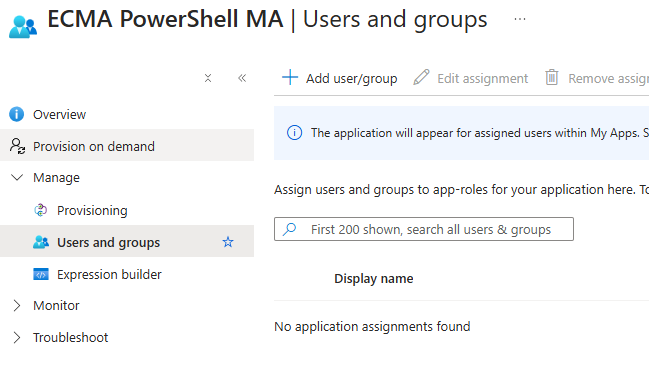
- Add test users by clicking “Users and groups” link
- Click “Provision On Demand” then validate by selecting the user and click “Provision”
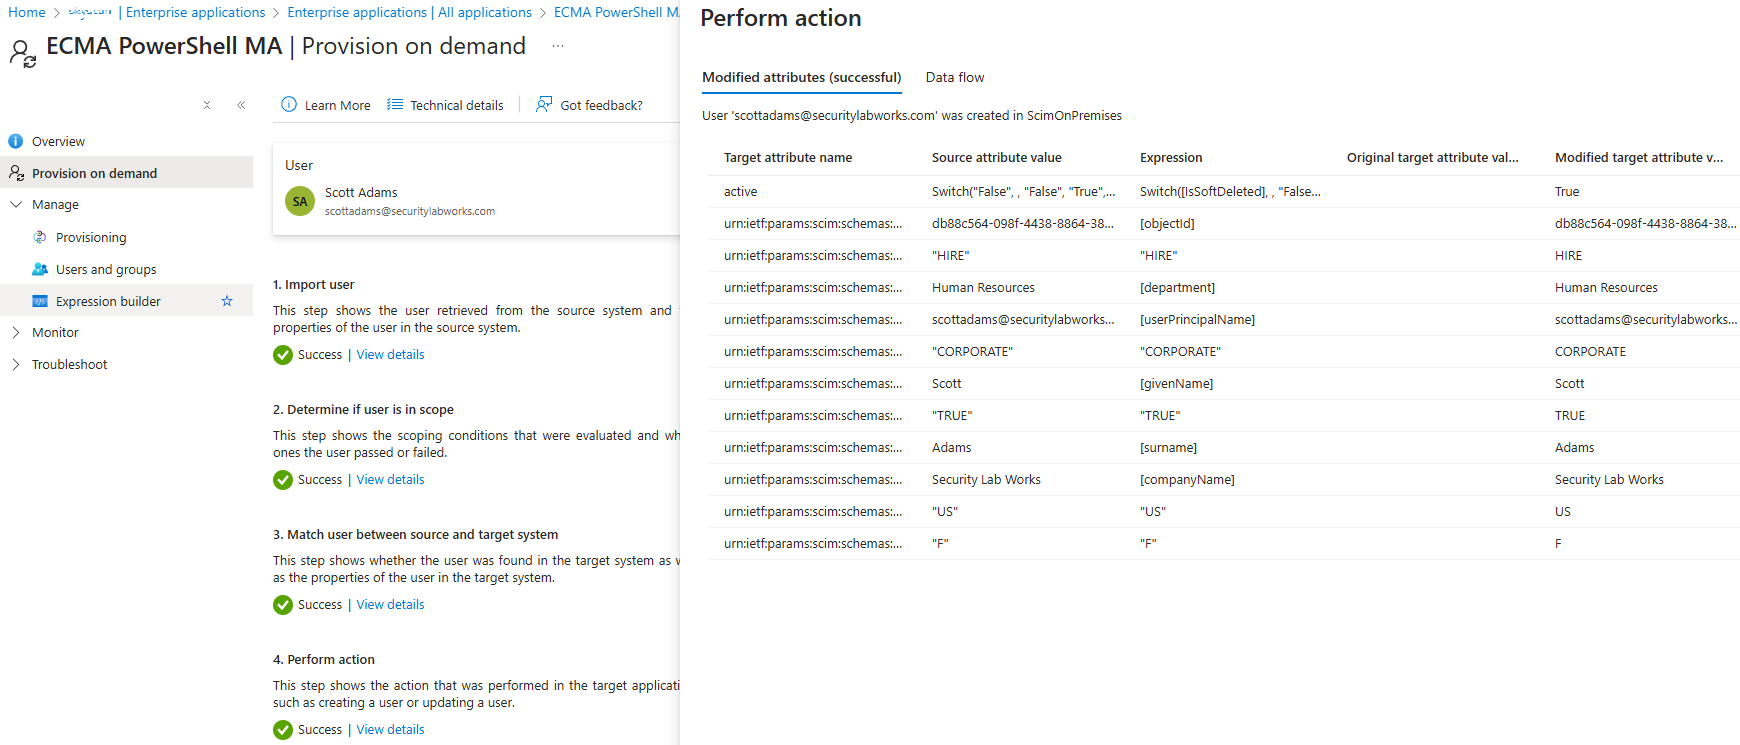
- Check the REST API https://samplerest.faisalrahman.com/Person that the user was provisioned. (Note: the JSON DB is refreshed nightly)
Resources
- PowerShell MA Scripts – click here download
- REST API for testing – https://samplerest.faisalrahman.com/

Leave a Reply