Special thanks to Annette Augustus for her contribution to this article.
Dynamic but not so dynamic. Azure AD has a powerful Dynamic Group feature that allows defining criteria with the User attributes to dynamically populate or un-populate a Security Group.
There are circumstances when the User attribute you want to filter by is not available in the list.
If you are in that situation Microsoft Graph API can be utilized to query the User object with the required filter and then with Power Automate to create a flow to populate the Security group with users who satisfy the criteria. The flow can be scheduled to run on a recurring basis and the interval between two consecutive runs can be configured as required.
Let’s solve this scenario.
GOAL:
• Configure Self-service password reset (SSPR)
• Criteria users must be Multi-factor (MFA) registered with a phone
Approach:
• Create a security group that will automatically populate/un-populate based on the criteria
• Assign the Security group for SSPR
Option 1: Using Power Automate Flow
Microsoft Graph API can be utilized to collect the list of users registered for MFA with Phone Number Authentication. Graph API can be utilized in Power Automate to create a flow to populate the users who satisfy the criteria for SSPR into an Azure AD group. The flow can be scheduled to run on a recurring basis and the interval between two consecutive runs can be configured as required.
NOTE: This approach has a limit of 100,000 on the number of users that can be processed in a single flow run. This limitation of 100,000 on the action requests in the flow cannot be lifted because it exists to protect the service. Detailed information here: Looping, concurrency, and debatching limits
Hence, option 1 is viable for use in an environment with less than 100,000 users.
Steps for Configuration:
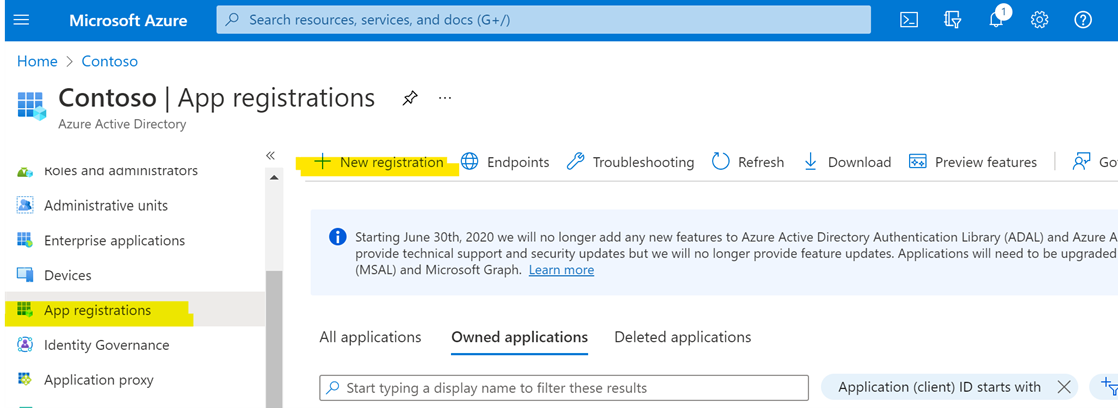
- Go to Azure Active Directory -> App registrations and click the + New registration button.
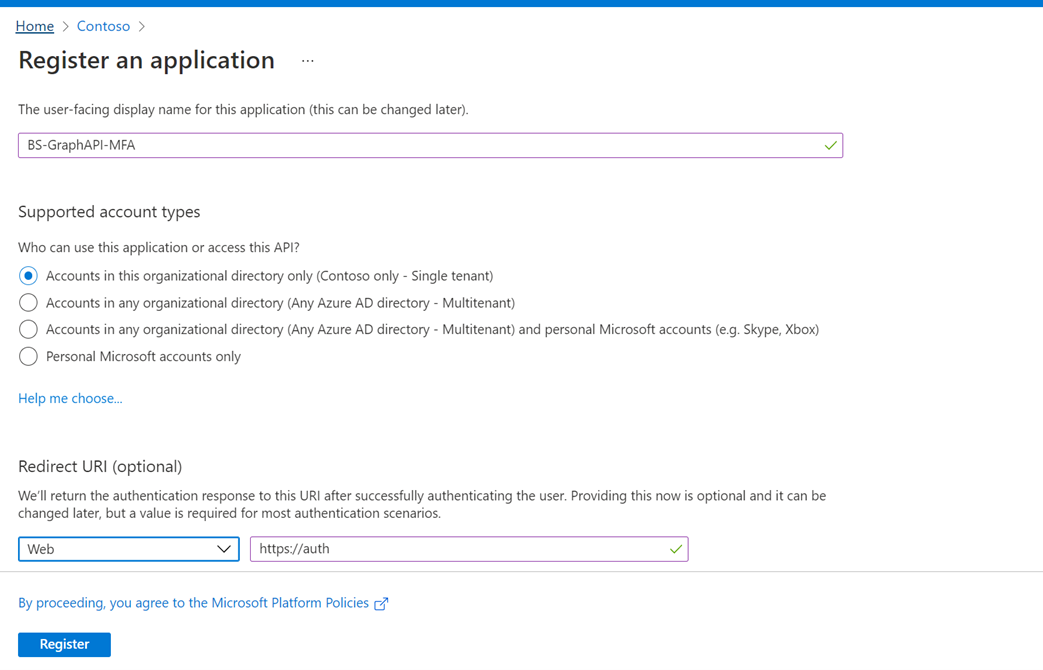
Assign a name to the Application, and fill the URL with the value https://auth
- Register the application:
- Once the application is created, go to the API Permissions tab.
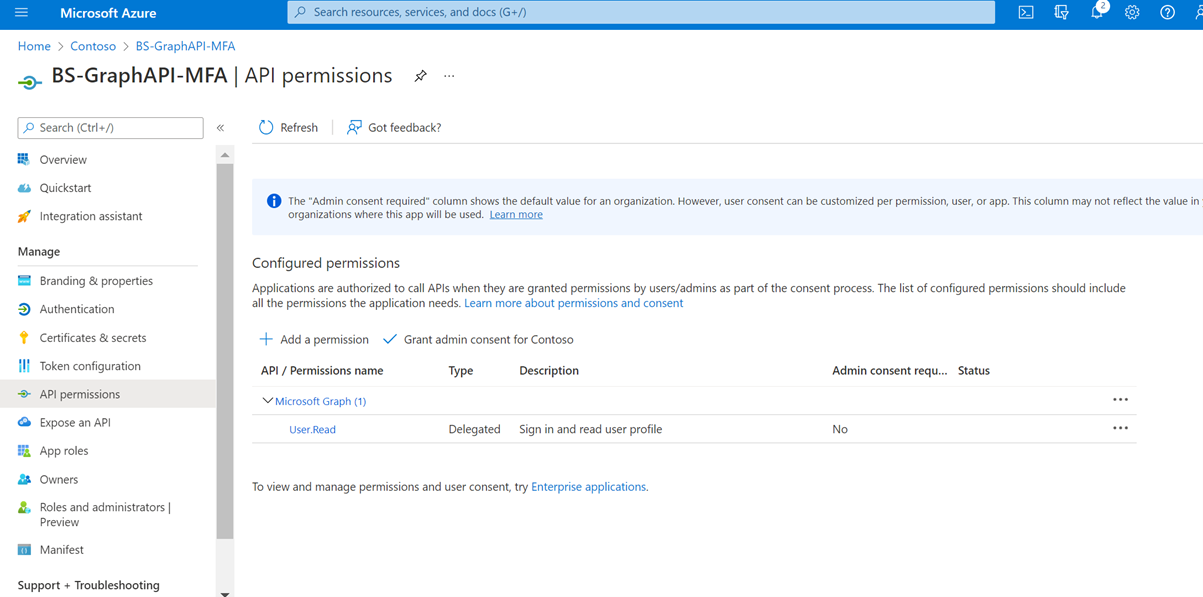
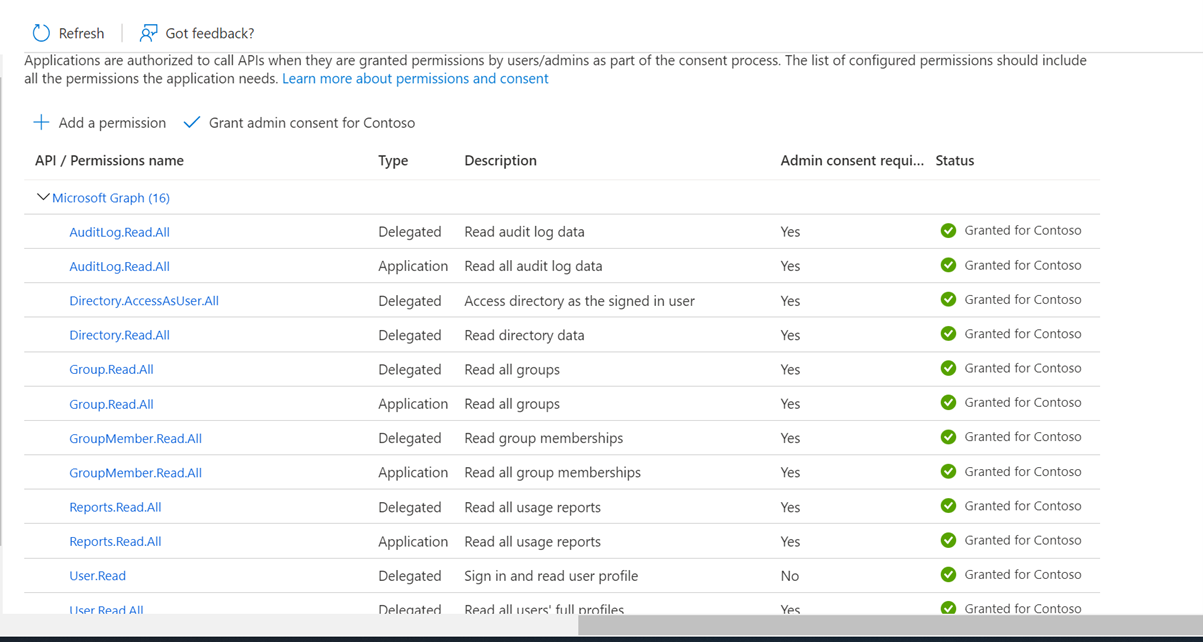
- Add the following permissions for the Microsoft Graph:
| Permission type | Permissions |
| Delegated | Reports.Read.All, AuditLog.Read.All, Group.Read.All, GroupMember.Read.All, User.Read.All, Directory.Read.All Directory.AccessAsUser.All UserAuthenticationMethod.Read UserAuthenticationMethod.Read.All |
| Application | Reports.Read.All, AuditLog.Read.All, Group.Read.All, GroupMember.Read.All, UserAuthenticationMethod.Read.All |
- Grant Admin Consent once the permissions are added:
- Go to the Certificates & secrets tab, and create a new client secret. Copy the secret value and save it on a notepad for use later. Also, take note of the Tenant & Client ID on the Overview page.

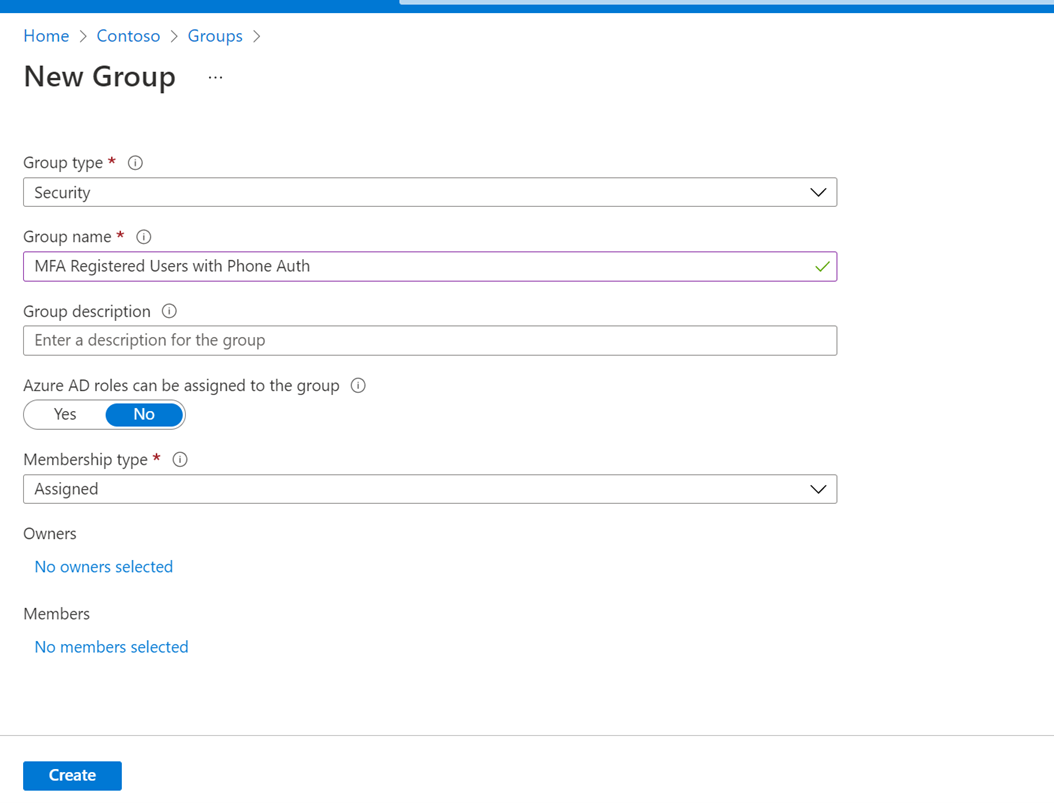
- To pull the data out of the Graph API, an Azure AD Group is required to assign the users. Created an Assigned Security group in Azure AD and leave it as is. For later use, take note of the Object ID of the group.
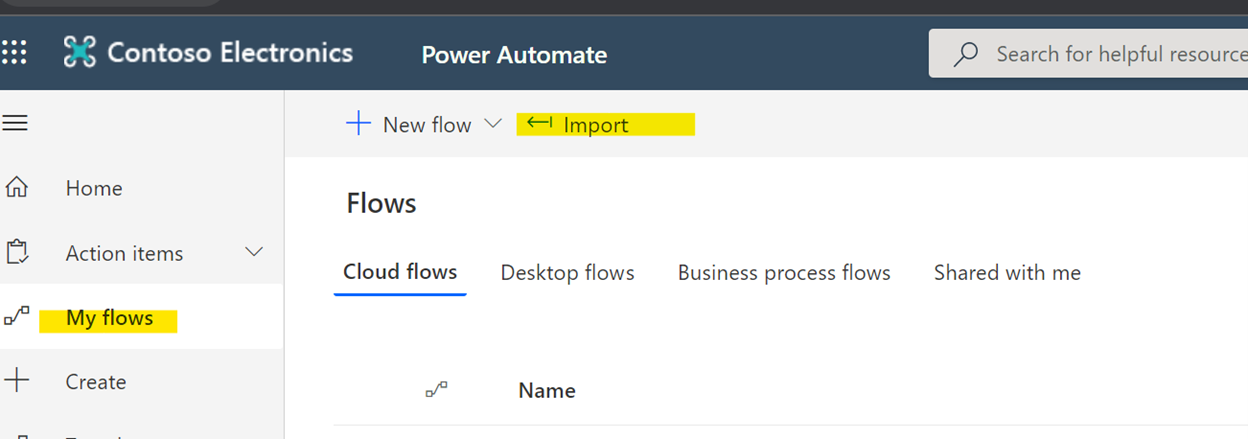
- Import the below flow into Power Automate: https://flow.microsoft.com.
Download Code Sample - To import a flow, first click on the import button in the top right-hand corner of the screen.
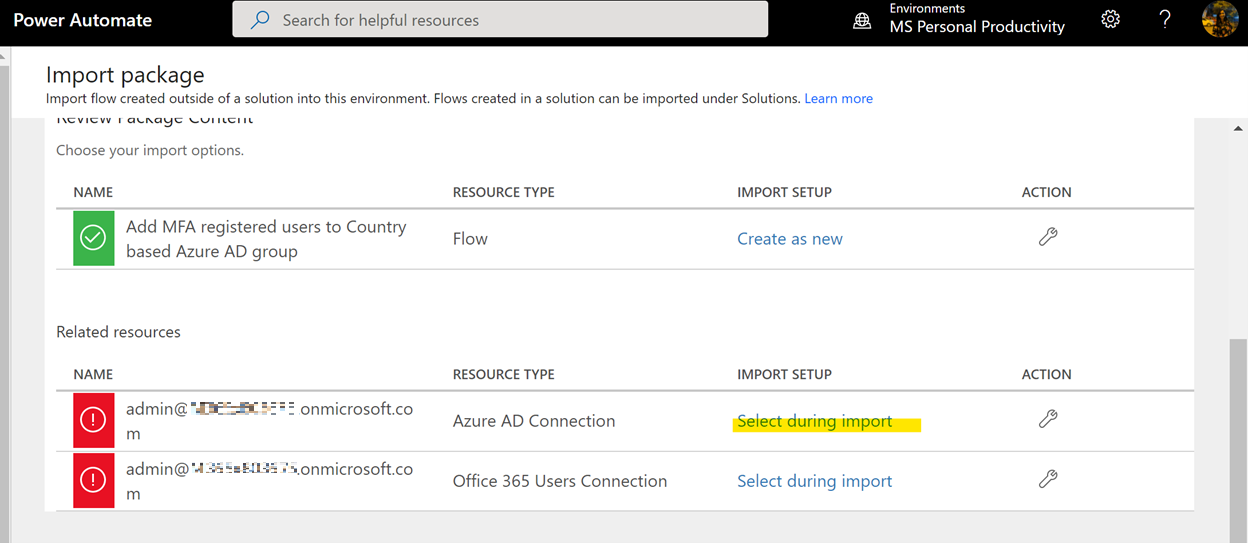
- Next, upload the package file and wait for the screen to show up the package details
- When configuring the flow settings, choose to create a new flow
- Select the appropriate connections required to set up the flow as part of the import process.
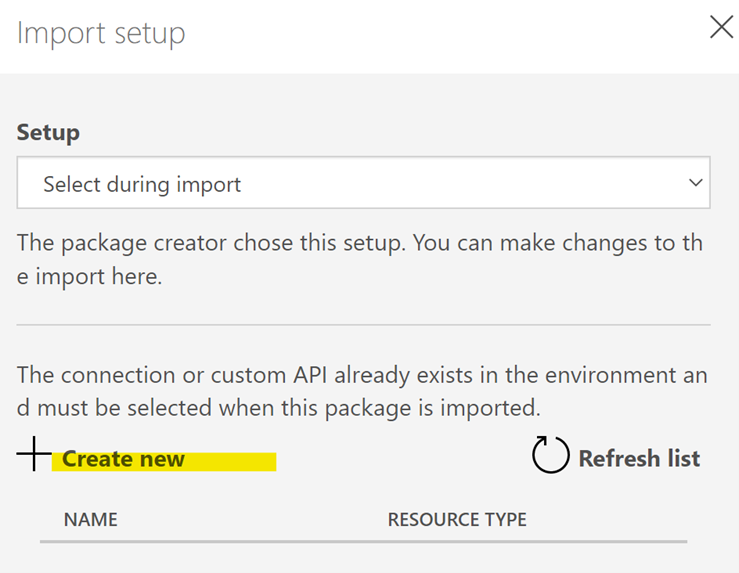
- Click on the “Select during import” option as you see below.
- Click on “Create new”
- Click on “New Connection” on the left top corner of the page that loads:

- Search for Azure AD, and click on the connection named “Azure AD” from the search results:
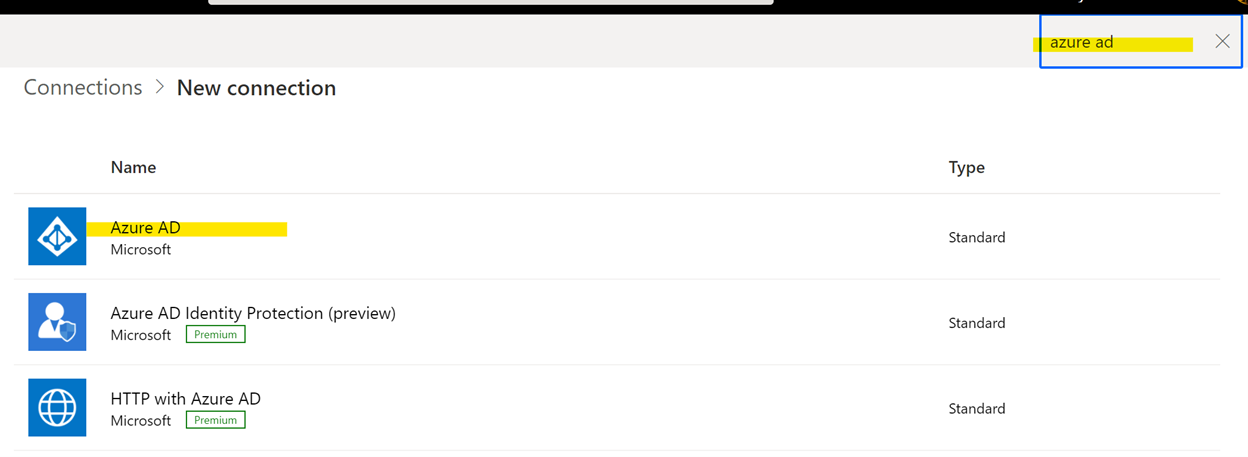
- Login with “Global Administrator” credentials.
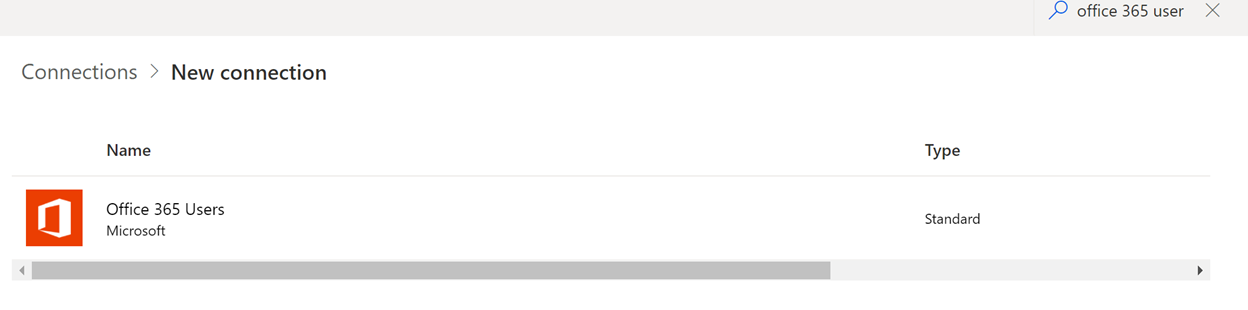
- Also, add “Office 365 Users connection”
- Now, go back to the Flow import page, and choose the right connections, save and submit:
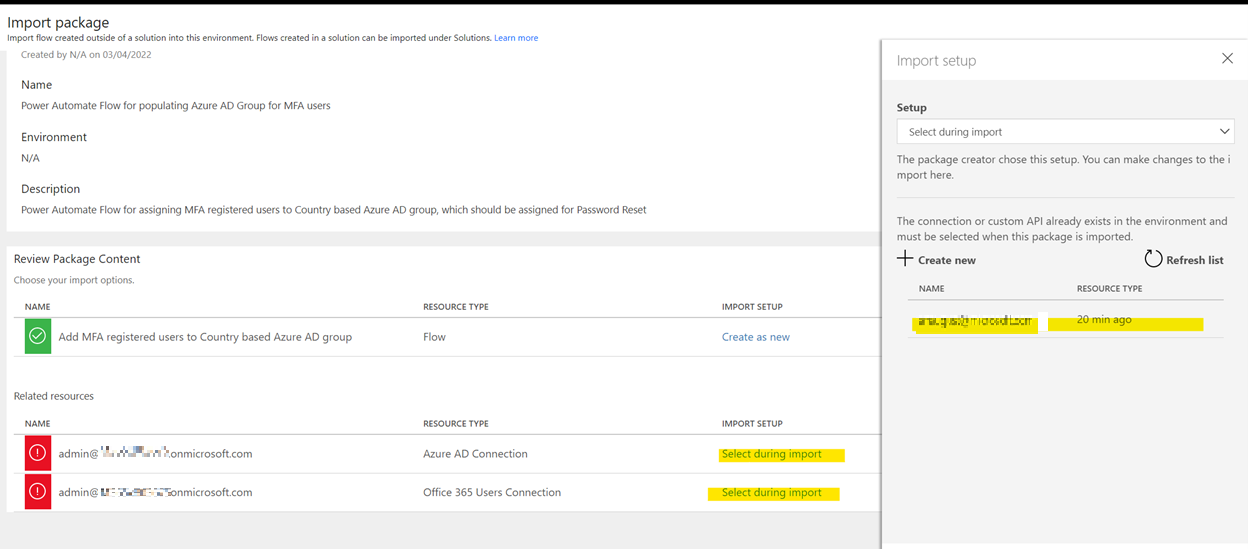
- The Import button will light up once all the required settings have been successfully configured. Once imported successfully, Edit the flow and modify all the HTTP activities inside the flow and update the appropriate values:
Tenant: <provide your Tenant ID>
Client ID: <Client ID of the application created in Step 2 above. Client ID can be found in the app overview page>
Secret: <Noted in Step 6 above>
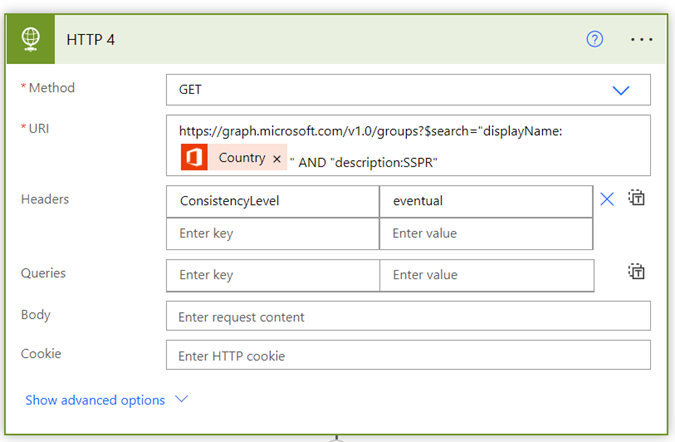
There are 4 HTTP activities to be updated, namely: HTTP: Get List of Users, HTTP 2, HTTP 3, HTTP 4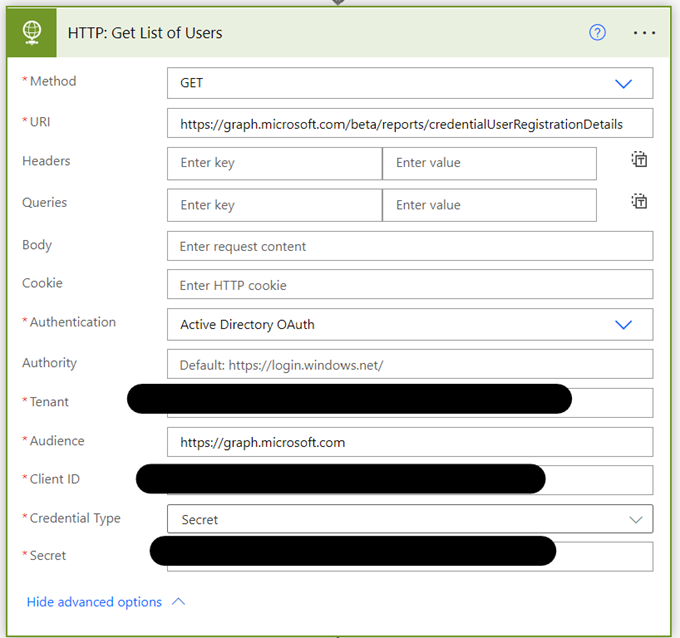


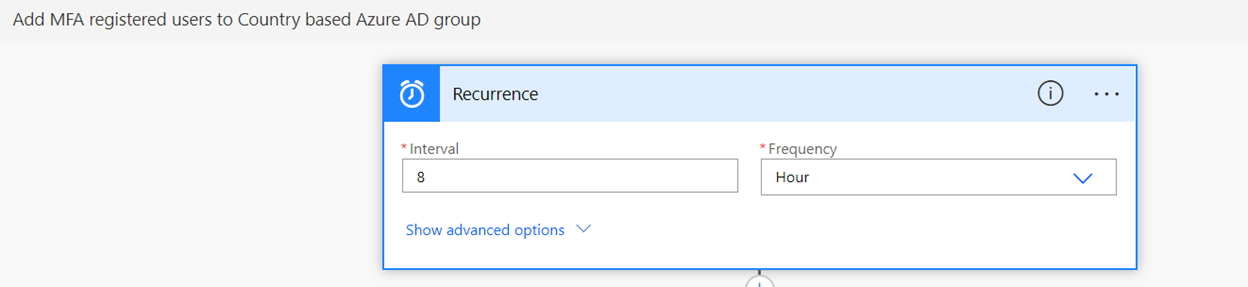
- Once updated, update the recurrence pattern for the flow in the first activity named “Recurrence”:
- Save the flow, test, and resolve any errors.
- Once the flow is created, run the flow manually to check if the Azure AD group is populated with the right membership.
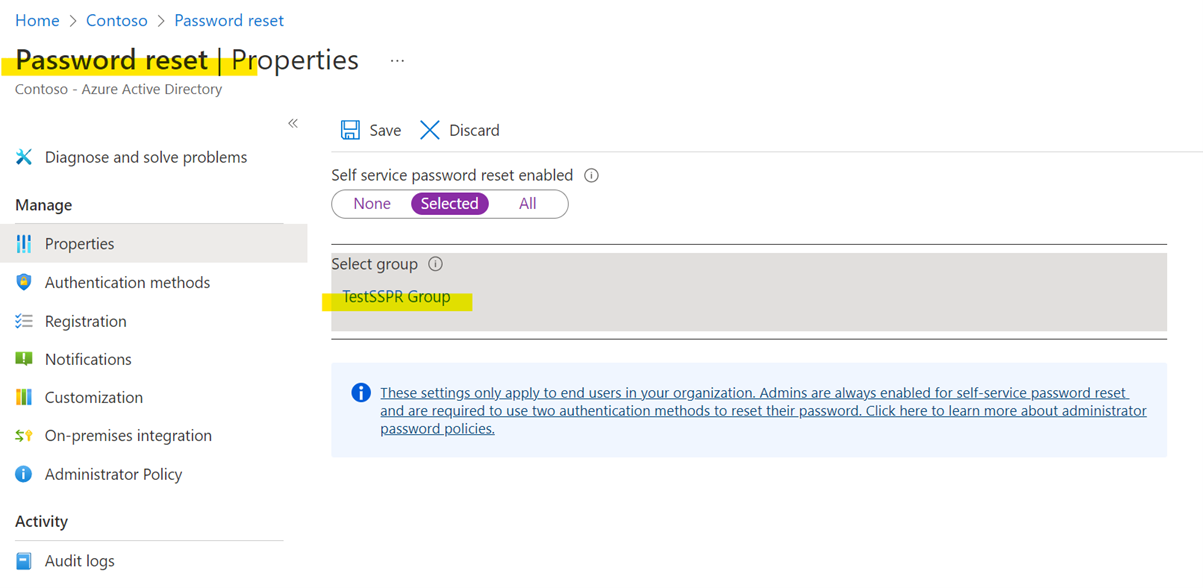
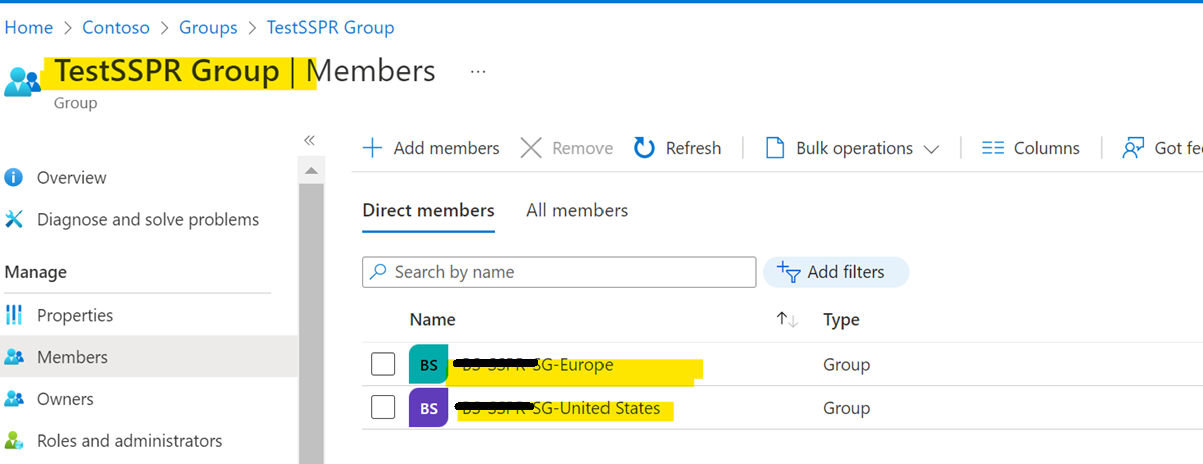
Configuring Password Reset for the Azure AD Group: - For enablement of Password Reset, the members have to be part of a single group. Since we have multiple groups, based on the “Country” attribute, all these groups need to be added to a main group, which will be configures for SSPR. Eg: The Azure AD Group for each region should be member of an Azure AD Security Group (eg. “TestSSPR Group” below) which will be mapped for Password Reset.
- Once the group membership is mapped, go to Azure Active Directory>Password Reset. Map the group created above for Password Reset or add the group as member of the current group mapped for Password reset:

Option 2: Using PowerShell to populate custom user attribute and then utilizing the attribute for creating Azure AD Dynamic Group criteria
In Azure Active Directory (Azure AD), attribute-based rules can be used to enable dynamic membership for a group. Dynamic group membership adds and removes group members automatically using membership rules based on member attributes. Extension attributes and custom extension properties are supported as string properties in dynamic membership rules.
For list of supported properties in Azure AD Dynamic Groups, refer link
Steps
- Create a PowerShell script that checks if
- User is MFA registered (and) has at least one authentication method registered (and) has a non-null Phone Number (if Phone authentication is registered). If yes, then set the custom extension property value in Azure AD to “True” for the user. If not, then set the custom extension attribute to “False”
Schedule to run this script using Task Scheduler on a recurring basis so that the extension attribute value is refreshed.
- Create Dynamic Security Groups in Azure AD for each of the BU as described below:
BS-GraphAPI-BU1
BS-GraphAPI-BU2
BS-GraphAPI-BU3
BS-GraphAPI-BU4
BS-GraphAPI-BU5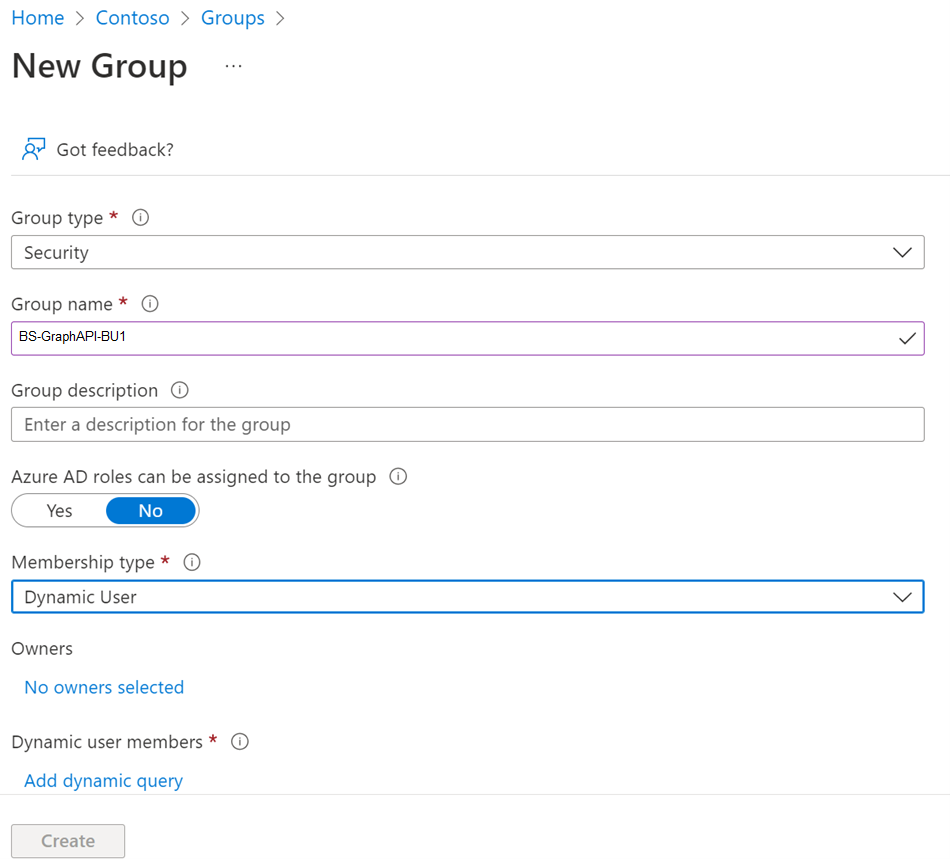
Click on “Add dynamic query” and create two criteria inside the group as below, where “extension_<application_id>_customAttribute” (in pic below) should be the custom extension attribute that is being set through the PowerShell script and “country” should contain the Business Unit value for each user: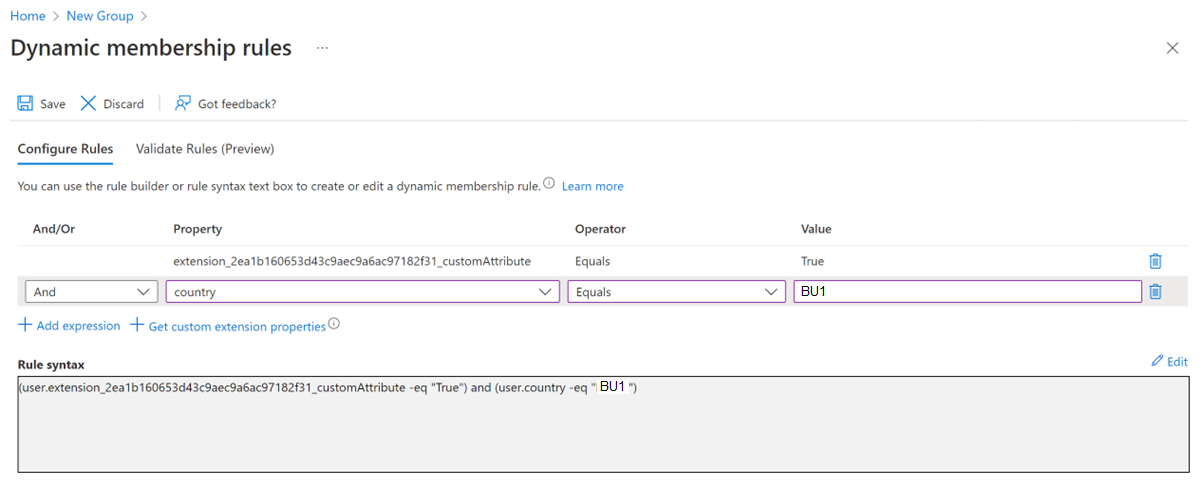
- Group membership will get auto-populated based on the criteria defined and these groups can be added as members to the Azure AD group mapped for Password Reset.